Cubic Panorama
The QTVR viewer can rotate their view about any axis* and create an animation.
Unlike the cylinder panorama, the cubic panorama is not directly supported by Bryce.
However it only requires six rendered images with specific camera settings.
* The Quicktime viewer uses Euler angles and therefore suffers from "gimbal-lock" at the polar singularities.
When the view is to the ceiling or floor, the viewer can only rotate about yaw (pole) and not change pitch or roll.
Procedure.
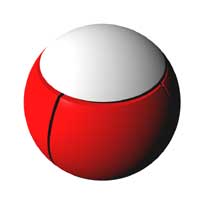
0 For your first one, make a simple scene and plop the camera smack in the middle.
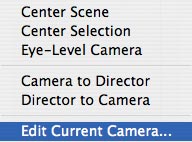
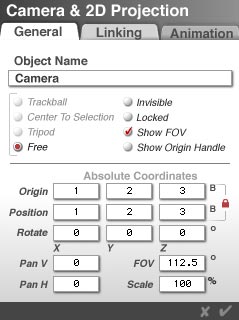
- Edit the Camera Select the Camera View.
- Set camera field of view to 112.5 degrees.
- Set camera scale to 100 percent.
- Clear all the other camera offsets and rotations, leaving only the XYZ position.
-
The angles are easy to remember:
| Image |
X rotation |
Y rotation |
Z rotation |
| 1 |
0 |
0 |
0 |
| 2 |
0 |
90 |
0 |
| 3 |
0 |
180 |
0 |
| 4 |
0 |
270 |
0 |
| 5 |
-90 |
0 |
0 |
| 6 |
90 |
0 |
0 |
For now, concentrate on image 1.
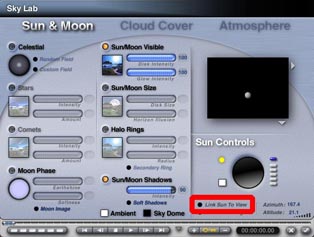
- Edit the sky Disable "Link Sun to View" in Sky editor
(if you are using sky or sun, etc. If no sky or sun this should not matter)
- In document setup, set a square image of appropriate dimensions (larger images yield better panoramas).
For best results, I typically set the render size to 768x768, to make a movie of 800x600.

- Yep, plop the camera smack in the middle of the model, or wherever you think it should be!
Here is a top view and a director's view.
Be sure to switch back to Camera view before saving any files.
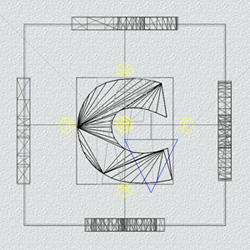
 top view
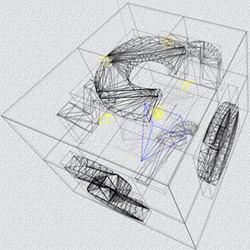
 director's view
- Make the six "face" renders. To do this efficiently I found a little sub-procedure.
- 1 Set the camera angle, render for one minute or just enough to make out some detail.
- 2 Being satisfied, save the bryce scene as xxxxxf1 (project xxxxx, face 1).
- 3 Change the camera to the next angle and repeat for faces
f1 (north), f2 (east), f3 (south), f4 (west), f5 (ceiling), f6 (floor).
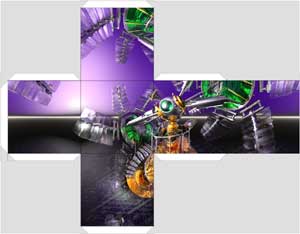
The layout below is arranged for printing a folding box (see "Now What" below).
- 4 Though crude, many pano mistakes are visible at this stage.
Make the pano by dragging the six image files to the MakeCubic application (or yours) and in about one second I can preview the pano.
If Ok, quit bryce, then drag the six bryce files to the bryce icon and proceed to step 5. If not, correct the problem
and regenerate the face (or faces) model(s), return to step 2
 crude pano
- 5 Bryce batch-renders them and saves the finished renders.
Now hide Bryce and use other apps or go to sleep.
In the morning (sic) the renders are all done.
- 6 Make the finished pano by dragging the six image files
to the the MakeCubic Icon.
- 7
View the panorama in QuickTime Viewer or your browser.

finished pano
To me the best models for panos are harder to make
because you really have to think in the round.
Normally, in a still image, what's behind you doesn't matter so much.
Dying to see your pano, so be sure to post a screen snap
and a link to your major pano goodness!
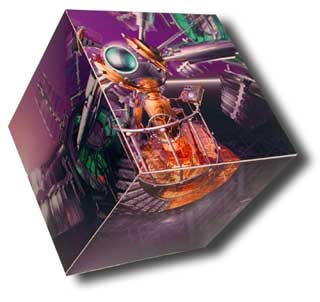
Now what?
A natural application is a cubic box.
Below is the plan development of such a box.
Print, cut out, fold up.
tools

makeCubic
Free Apple utility for stitching the six numbered renders into a QTVR movie

cubicConverter
Utility for stitching the six numbered renders into a QTVR movie.
Convert to pano flats (equirectangular projection),
and perhaps use the PhotoShop
Filter:Distort:Rectangular To Polar filter.
pano flats
cubicConnector
Utility to stitch panos together with hotspots.