Bryce
for Incised Stonework
by James J. Lemon
Q
OK
in step by step mode.. what did you use and how did you apply those lines to
those pictures.. cuz it makes that scene 110% way kewl. And its proudly my background
for the time being. So please if you could enlighten me.
(Sent 11/7 17:25)
A
Ahem, here I go:
In this step I make all the elements for later deployment in Bryce. I used Corel
Painter 7 to alter the look of a photo, to be used as a stencil. I am taking
lots of liberty to boldly number these steps, in reality I went back and forth
many times, so you need not complete step 1 before going to step 2, etc.
 1 Painter
 Make a photo. (a)
a 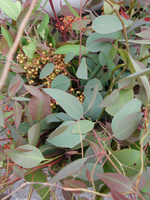
Make a line drawing in grayscale (b,c,d). There
are many ways to do this next step. I like the Painter 7 "Woodcut"
effect.
Open the photo and make a clone of the photo.
In the clone layer, apply the woodcut effect.
Play with the control sliders to taste, recalling we seek a line drawing. For example,
turning off the colors, leaves only black and white. A big factor is the "Black
Edge" and "Heaviness" sliders, seem to need attention for each
image.
When you get something reasonably close to a line drawing, apply and save. If you
need to start over, close this clone, make a new clone and reapply the filter.
The woodcut tool is great but the lines needed to be amplified somehow. Then I made
a clone of the woodcut clone, and begain tracing the hardest black lines using
the Smooth Ink Pen tool in black.
I also switched to white Smooth Ink Pen and cleaned up small noisy places created
by the woodcut tool on the inside of the leaf shapes. It was a matter of "cleaning
it up".
Black will become transparent, so we invert (d).
b 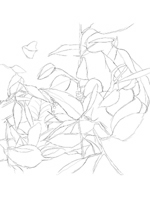 c
c 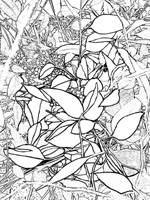 d
d 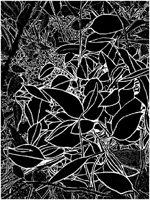
c
d Image (d) is ready to be used as a subtractor, with the following property: a sharp
black/white transition makes the subtracted lines very sharp and deep. If you
blur image (d), you get a softer profile, sometimes that's useful. My choice
this time is to have the sharp edges.
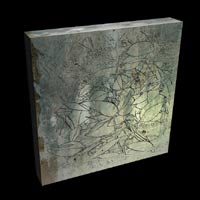
To make stained glass, I wanted some of the color between the metal panes.
Make another handpainted image of the same dimensions (e). Again
my favorite tool is Painter 7, where I experimented with many different brush
effects, seeking an oil painting effect. An easy choice to start with is the
Smeary Bristle Cloner.
For the edge, I recall using the Dry Brush loaded with pure opaque white.
e 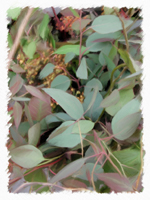
I chose to multiply the images (c * e) together (= f)
f 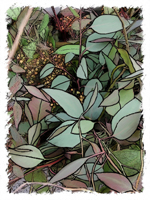
Image (f) is the pattern for the glass.
For the floor, I wanted something with radial symmetry, so I tried making the image
square and applying the "KPT Vortex Tile" filter.
g 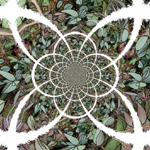
With our images (d), (f) and (g), we are ready to go to Bryce.
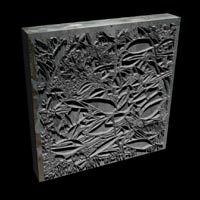
2 BryceMake a stone textured cube ...or something. I have found one or two stone textures
that work very well at www.animax.it. Thanks animax.it!
Set Attributes to positive. (h)
h 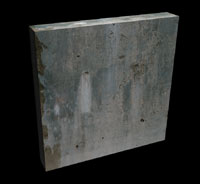
Make a terrain object or symmetrical lattice. For incising into something, I prefer a terrain.
Set Attributes to negative.
Edit the terrain - set size to at least 1024, click
on picture tab and Load your line drawing.
Position the lattice so it cuts into the cube. (i,j)
i 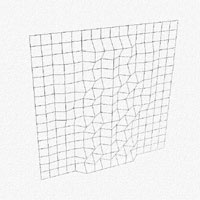
j
Group the positive cube and negative lattice. The lattice white removes stone, the
black removes nothing!
k
 3
3 upload result to renderosity so we can have a look!
. . . . . . . . . . .
Here are some examples I've made for you.
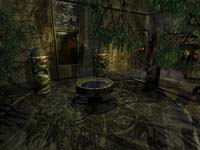
Here it's mapped in several different mappings.
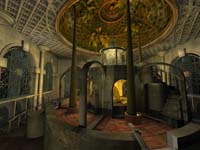
The positive and negative are both employed here.
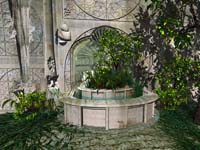
The fountain is subtracted from the sheer face.